Working with Color > Specifying stroke and fill attributes > Using the Paint Bucket tool
Using the Paint Bucket toolThe Paint Bucket tool fills enclosed areas with color. It can both fill empty areas and change the color of already painted areas. You can paint with solid colors, gradient fills, and bitmap fills. You can use the Paint Bucket tool to fill areas that are not entirely enclosed, and you can specify that Flash close gaps in shape outlines when you use the Paint Bucket tool.
You can also use the Paint Bucket tool to adjust the size, direction, and center of gradient and bitmap fills. For information on creating a bitmap fill, see Breaking apart a bitmap.
Note: When you modify a bitmap fill with the Paint Bucket tool, all instances of the bitmap fill are modified, not just the fill in the current selection.

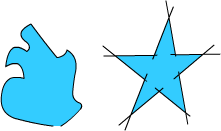
The left shape is not fully enclosed but can still be filled. The star shape consists of individual lines that enclose an area that can be filled.
To use the Paint Bucket tool to fill an area:
| 1 | Select the Paint Bucket tool.
|
| 2 | Choose a fill color and style, as described in Working with solid, gradient, and bitmap fills in the Fill panel. |
| 3 | Click the Gap Size modifier and choose a gap size option: |
| Choose Don't Close Gaps if you want to close gaps manually before filling the shape. Closing gaps manually can be faster for complex drawings. | |
| Choose a Close option to have Flash fill a shape that has gaps. | |
| 4 | Click the shape or enclosed area that you want to fill. |
Note: Zooming in or out changes the apparent, but not the actual, size of gaps. If gaps are too large, you may have to close them manually.
To adjust a gradient or bitmap fill with the Paint Bucket tool:
| 1 | Select the Paint Bucket tool. |
| 2 | Click the Transform Fill modifier.
|
| 3 | Click an area filled with a gradient or bitmap fill. |
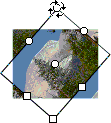
| When you select a gradient or bitmap fill for editing, its center point appears and its bounding box is displayed with editing handles. When the pointer is over any one of these handles, it changes to indicate the function of the handle. | |
| Press Shift to constrain the direction of a linear gradient fill to multiples of 45° . | |
| 4 | Reshape the gradient or fill in any of the following ways: |
To reposition the center point of the gradient or bitmap fill, drag the center point.

|
|
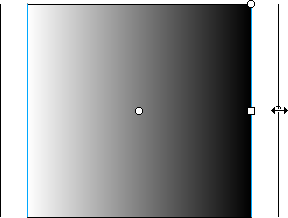
To change the width of the gradient or bitmap fill, drag the square handle on the side of the bounding box. (This option resizes only the fill, not the object containing the fill.)

|
|
To change the height of the gradient or bitmap fill, drag the square handle at the bottom of the bounding box.

|
|
To rotate the gradient or bitmap fill, drag the circular rotation handle at the corner. You can also drag the lowest handle on the bounding circle of a circular gradient or fill.

|
|
To scale a linear gradient or a fill, drag the square handle at the center of the bounding box.

|
|
To change the radius of a circular gradient, drag the middle circular handle on the bounding circle.

|
|
To skew or slant a fill within a shape, drag one of the circular handles on the top or right side of the bounding box.

|
|
To tile a bitmap inside a shape, scale the fill.

|
|
Note: To see all of the handles when working with large fills or fills close to the edge of the Stage, choose View > Work Area.